Monday 28 November 2016

Fixing the Window Seal

Already a while ago I had rang the company AutoGlass, to find out if they could fix a window seal. They declined - they only exchange full windows, and they do not repair seals.

I then found another company on eBay which would sell a full LDV front window - and that company is in Leeds! So I rang them, and yes, they also replace seals only. But they could not give a guarantee that the old window would not break. Depending on the condition of the old seal it might be impossible to get the window out or back in without breaking it. Well, that was a risk I had to take.

The window glass would be a bit below £90. The seal is £30, and the labour is £50. Reasonable. So today the two guys from YPM Windscreens came in the afternoon and began working on it. Yes, it was a bit hard to get the window out, and in particular to get it in again, because there was very little clearance at the top where the roof is attached in the front.

But they managed, and now I have a brand-new seal which hopefully will stop any water from coming in. I still have to make sure that the water that is already in gets dried out.

YPM have arrived, preparing for window removal.

Here is the LDV without front glass window. A rare sight, I hope!

The new rubber seal is affixed to the old glass window.
Some grease is put in place to allow the rubber to slide into place easily.

The new rubber is almost there on the old glass window.

And now the window is put in place with the new rubber seal.

Almost done!


Saturday 26 November 2016

Wiring up the Leisure Battery

When trying to decide which leisure battery to get, I had the choice of either spending as little money as possible now, or go for something really good.

Halfords had a good sale on a 110 Ah leisure battery for less than £100. But I found the XV190MF at Tayna:  https://www.tayna.co.uk/XV190MF-Powerline-Leisure-Battery-P8959.html nominal a 110Ah battery, with a slightly reduced capacity depending on the current drawn. The argument for this battery was the price: only £43, which I found reasonable. Maybe in a few months I add another identical battery to boost the overall capacity.

Then I got a few wires, cables, and the important volt/ampere meter: http://www.ebay.co.uk/itm/152102998570?_trksid=p2057872.m2749.l2649&ssPageName=STRK%3AMEBIDX%3AIT on eBay, sent directly from China. I already had used this device before, and it is great because it goes simply between the battery and the consumers resp vehicle electrics, without the need for a separate resistor to measure current. Also this device shows current in both directions, so I can monitor if the battery is getting charged or is getting depleted.

I got a three-for-price-of-two deal, which means this device costs just £10. I am not using it to monitor Ah, but directly the flowing current in Ampere.

The wiring up meant I needed to get somewhere the +12V from the vehicle electric system, which would then be connected via the split charge relay TEC3M (costs around £11) to the leisure battery. I took the +12V from the cigarette lighter: at least this line usually can provide up to 20A, and it was the only line which I could easily reach. The leisure battery will then be charged from the vehicle electric system, when the engine is running and the vehicle voltage is above 14V, generated by the alternator. I like these inexpensive TEC3M relays: they can switch up to 30A, and they provide an additional contact for "fridge", which I use to connect an LED which lits up when the relay connects both batteries.
 

I added a circuit breaker in that power connection, which I also use as a switch to disconnect both batteries, if I want to. I used a 60A circuit breaker http://www.ebay.co.uk/itm/181592244962?_trksid=p2057872.m2749.l2649&ssPageName=STRK%3AMEBIDX%3AIT - in my experience the actual current flowing between the batteries is usually not more than 5Ampere.


So now the setup is completed, and the leisure battery is being charged whenever I drive with the vehicle.

I put the leisure battery in a battery enclosure which I still had left over from my previous campervan work. It now stands under the rear seat. Will need to be more rigidly affixed to the vehicle, but for now it is OK. It is so heavy that it usually does not slide around.

Now I can begin wiring up more of the electric circuits in the vehicle which will be powered by the leisure battery, for example additional LED lamps.

Leisure battery behind one the passenger seat row. The wiring already includes the volt-/amperemeter.

Wiring is at the moment only loose, in a cardboard box. Here is the TEC3M relay wired up.


Thursday 24 November 2016

First Service

Since I have no idea about when the vehicle had its last service, I decided to give it a full service. Looking online for LDV service station I came across the Horforth Towbar Vehicle Service (HTVS). I had already been there for fitting towbars to my previous vehicles, so I knew they were reliable. Also they had good reviews online. So I left the LDV there for a day and paid for the service (£198).

Turns out that most things are OK. But a few things need to be fixed soon: front brakes are worn and need to be replaced (both the disks and the pads; disk has a crack, which was noted in the MOT advisory). One ball bearing needs to be replaced. And the brake fluid must be changed.

Not much then actually. Also the front window seal is the culprit which lets water through, so I need to fix that.

And next year the kingpins need to be replaced. I read already a lot about this - it is a weak spot of any LDV, as these kingpins wear out, and are difficult to replace. But I can do this then next year, before the next MOT.

Sunday 20 November 2016

A First Wash

Now that the vehicle can be out on the road after the taxation issue has been solved, I decided to have the vehicle undergo a thorough wash. At the Hand Car Wash I drove up on Sunday afternoon. £20 for a complete wash, £15 for a more superficial wash. Since it was quite cold outside, I decided not to let the roof being scrubbed, but just the side walls.

Here is someone just cleaning the front window:


And here is how the van looked after the wash - quite presentable now:


Friday 18 November 2016

Driving to Uni


First time at Headingley Campus of  Leeds Beckett Uni, my work place. I have to find a large parking spot, where I can easily get in and out of the large vehicle. This is in front of the cafeteria.

Monday 14 November 2016

Taxation Hell - Part 2

After I had sent all my documentation to DVLA on 19 October, I did receive a letter from them on 1 November, telling me that I need to provide the following:
1) a statement about the use of the vehicle. Needs to state that I use it solely for private purposes, without any business use.
2) Photos of the van, to document evidence that this is indeed a minibus and not a panel van as stated in the logbook.

So I quickly took 4 pictures (registration plate visible) and sent this to the DVLA, together with the statement, on 2 November.

After more than a week the taxation status of this van still was showing up as "untaxed", so I decided to ring the DVLA on Friday, 11 November. Spoke to a nice and friendly bloke there, who told me that I just need to wait - he could not confirm if my letter has been received. He told me he would call me back once he had info about the status.

I did ring again on Monday, 14 November - still nothing there about my documentation that I had sent. Which meant that I still was not able to take the vehicle out on the public streets. But then I received a phone call in the afternoon from him, and he told me that he did indeed now receive the application, and a colleague of him has processed this. So the van is taxed now - Halleluja!

A positive outcome, and I have now four pics of the van:


Friday 11 November 2016

Window Tinting

While waiting for the tax to be processed, I was not able to drive the vehicle on public roads. But I could begin with some of the conversion tasks. One of the easiest and also most urgent was to tint the windows. Since in the beginning I would just use this van to transport things back and forth, I did not want to have all of these things be visible from the outside.

So I ordered some window tinting foil and began working. But there was a problem: there are four windows, each 1.50 m long. Quite a large distance, and I had big difficulties in applying the foil. I did screw up a few times my first attempts in attaching the foil. The problem was that once the sticky side of the foil got attached to itself, it was basically ruined because when trying to untangle the stuck parts, they tore away the tinging cover on that foil, and ugly folding marks with un-tinted parts remained.

I ruined basically 6 m of foil, before I had a better idea: to use a stable bar, at least 1.50m long, where I could attach the top part of the foil before I would remove the transparent foil protection over the sticky part. This would keep the tinting foil straight until it is applied to the window.

And it worked - I did order a new set of tinting foil, and was able to complete the tinting of all four windows in 2 hours. Just to let you know about the process: one has to spray soapy water onto the window (not using Ammoniak solution, therefore not using windows cleaner; I did add dish detergent into the water spray bottle, which then worked fine). Then one has to remove the transparent protective foil from the tinting foil, which then exposes the sticky side of that tinting foil. Now the foil can be pressed onto the wet window. Having the window wet allows the foil to be adjusted and shifted into place, before it is stuck to the window. With a squeegee the water underneath the foil is then squeezed out towards the border of the window, where it then can escape. Bubbles under the foil which remain can still be removed with that method at a later time.

I must note that the quality of the foil which I ordered the 2nd time was much better than the one I had the first time: The foil was a bit sturdier, and an occasional self-stick did not result in destruction of the foil, but I could just carefully lift it off and continue working. Not sure how long these links are still valid, bu this is the one that I did use in the end and which was very good to work with: 6m x 76cm 95% . And this is the one which I had previously used and had failed to apply it due to the large window size: 6m x 75cm, 95% .

I did use 95% blocking / 5% transmitting foil - is quite dark now inside, and I am considering using a 10% transmitting foil, should I be tempted to re-do the tinting at some point. The reason for considering this re-doing is that when cutting the edges of the foil off, I did not do a very good job: I did sometimes cut a bit too much, so there are some areas with a fully transparent edge frame now visible. Still, overall not too bad, and for now I can let it.

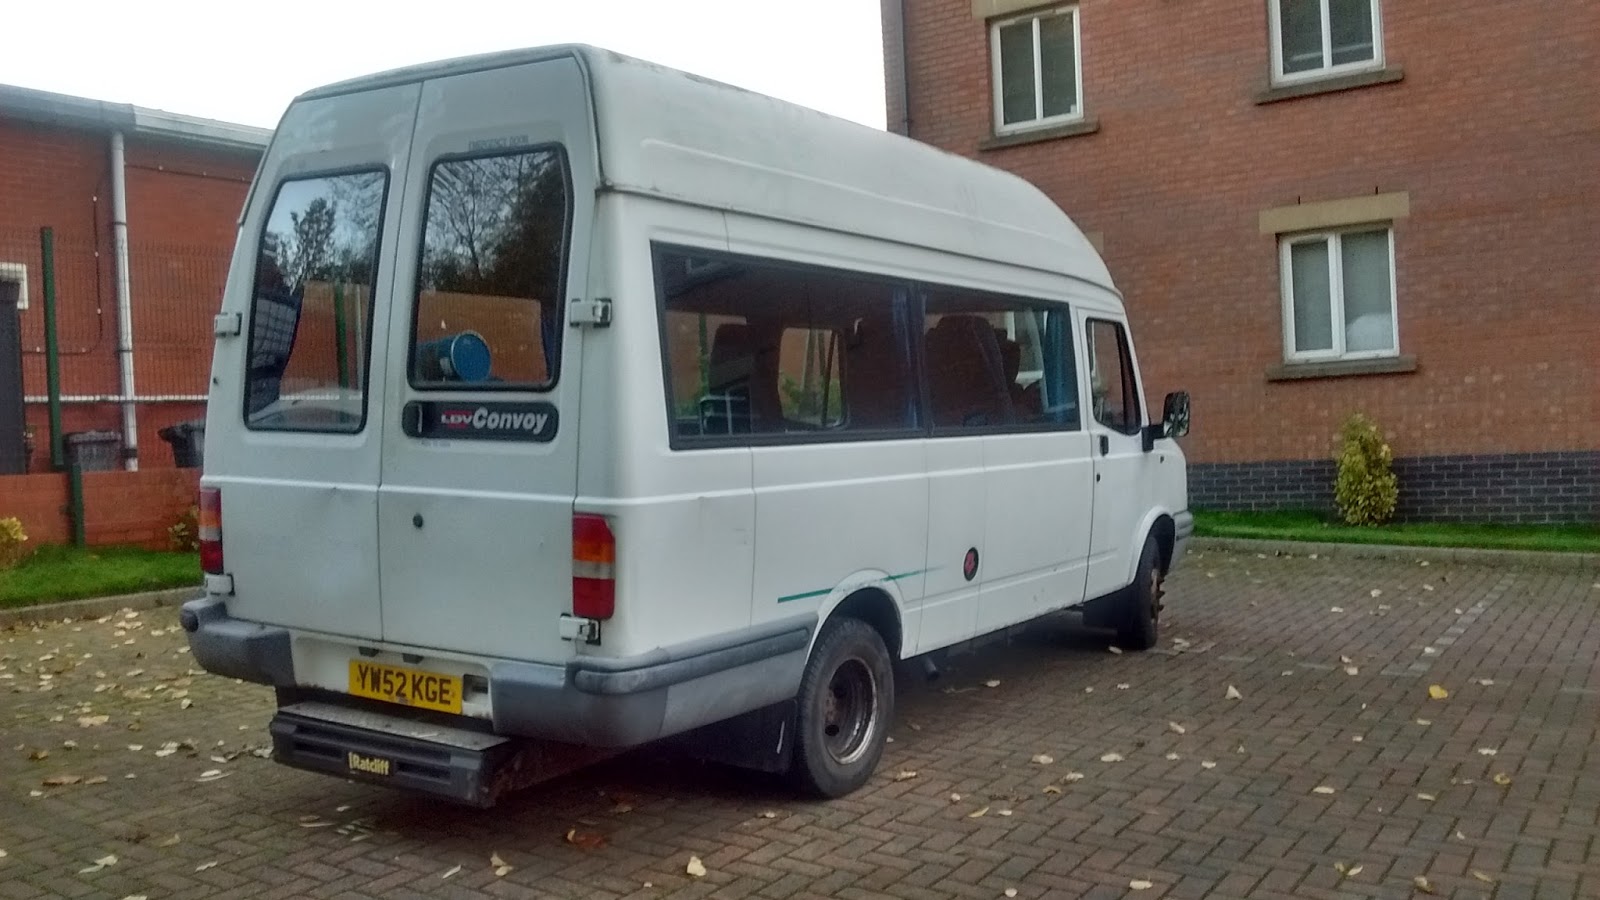
Here is how the van now looks with the tinted windows: